DIY Dried Orange Garland for Fall Decor
As the leaves turn vibrant shades of red and gold, it’s time to embrace all things cozy and autumnal. And what better way to add a touch of rustic charm to your home than with a DIY dried orange garland? Not only does it make for a stunning fall decor piece, but it also fills your space with a delightful citrusy aroma. So grab your apron and get ready to embark on this crafty adventure – because nothing screams fall quite like hanging slices of sunshine around your house! Plus, you’ll have an excuse to snack on some juicy oranges while you’re at it – talk about multitasking!

Why Dried Orange Garland is Perfect for Fall Decor
With the arrival of fall, it’s time to pack away the bright summer colors and embrace the warm hues and cozy vibes that this season brings. And what better way to do that than with a DIY dried orange garland? Not only does it add a pop of vibrant orange to your autumn decor, but it also exudes a rustic charm that is perfect for this time of year.
Apart from being visually stunning, dried orange garlands actually serve another purpose – they act as natural air fresheners. Yes, you read that right! As the oranges dry out, they release a subtle yet delightful citrusy scent that fills your home with an inviting aroma. So not only will your space look like a fall wonderland, but it will also smell like one too!
Now picture this: you’re snuggled up on the couch with a cup of hot apple cider in hand, enjoying the crisp autumn air outside your window. The soft glow from your fireplace dances on your face while you admire your DIY masterpiece hanging proudly above. Suddenly, you find yourself in awe at how such a simple decoration can transform an ordinary room into an enchanting fall haven.
So why settle for generic store-bought decorations when you can create something truly unique and meaningful? A dried orange garland is not just another fall decor item – it’s an opportunity to infuse handmade warmth into every corner of your space while filling it with delightful scents and adding eye-catching pops of color.
Materials Needed: Oranges, Twine, Baking Sheet
As the leaves start to change and the crisp autumn air settles in, it’s time to give your home a cozy makeover. And what better way to do it than with some DIY fall decor? Say hello to the dried orange garland! It’s a charming addition that brings warmth and color into any space. Plus, crafting it couldn’t be easier – all you need are some oranges, twine, and a baking sheet.
- Grab those juicy oranges! Not only are they delicious, but they also add a vibrant pop of citrusy goodness to your garland.
- Now here comes the fun part: slicing them up into thin rounds.
- Lay these slices onto a baking sheet lined with parchment paper and pop them into the oven at a low temperature for a few hours. As they slowly dry out, your entire house will be filled with an irresistible aroma that screams fall is here!

Step-by-Step Instructions on Drying Oranges
First, gather your supplies: oranges, a sharp knife, and parchment paper. Choose firm and fresh oranges for optimal results. Slice the oranges into thin rounds, about 1/4 inch thick. You can also cut them into semi-circles for a different look. Preheat your oven to the lowest temperature setting, usually around 200°F (93°C). Place the orange slices on a baking tray lined with parchment paper. Make sure they are not touching each other to ensure even drying.
Next, place the tray in the oven and leave the door slightly ajar to allow moisture to escape. This will help in achieving crispy and fully dried slices. The drying process can take anywhere from 2-6 hours depending on the thickness of your slices and oven temperature fluctuations. Keep an eye on them and rotate the tray occasionally to ensure even drying.
Once they are dry, remove them from the oven and let them cool completely before handling. At this stage, you can leave them as they are or add some extra flair by dusting them lightly with cinnamon or powdered sugar for added fragrance and visual appeal. Adding cloves or ribbon tied through small holes also adds that special touch of creativity.
Drying oranges is not only a practical way to preserve their freshness but it also unlocks endless possibilities for DIY projects like garlands, wreaths or potpourri sachets that bring festive cheer into your home during fall season!
Assembling the Dried Orange Garland
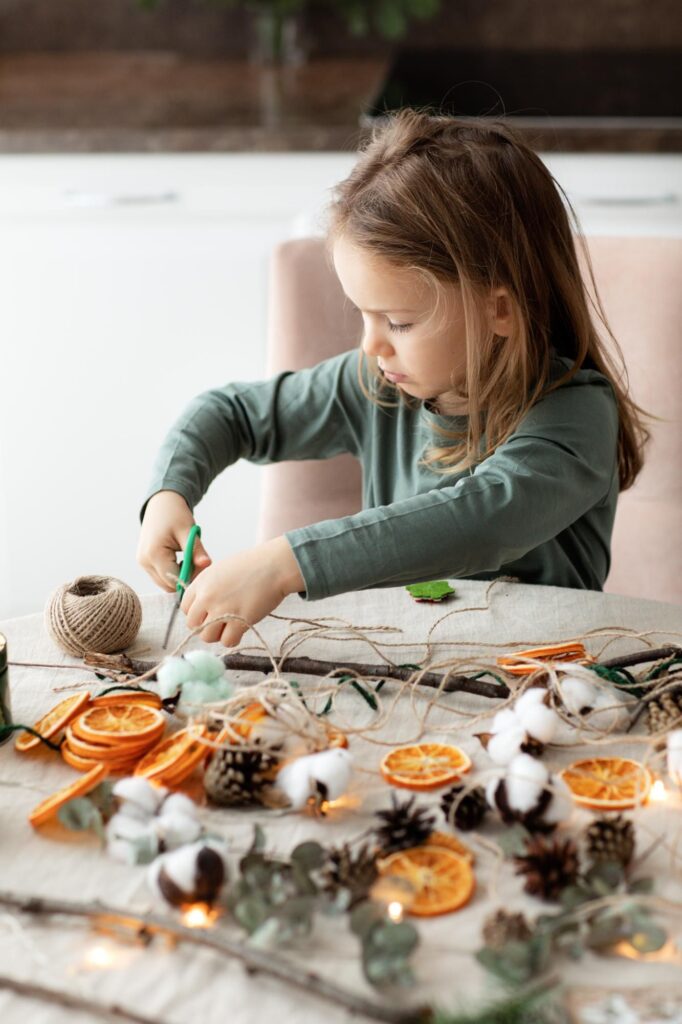
To assemble your own dried orange garland, cut yourself a length of twine – as long or as short as you desire – and start stringing those dried orange slices onto it. Alternating with cinnamon sticks or sprigs of rosemary can add an extra festive touch if you’re feeling fancy. Once you’re done threading all your slices, tie off the ends of the twine and find the perfect spot in your home for this charming fall decoration.
Voila! Your DIY dried orange garland is complete and ready to be admired by all who enter your autumn wonderland.
Tips for Hanging and Displaying the Garland
First things first, consider using removable hooks or adhesive strips instead of nails. They’re perfect for renters or those who just don’t want permanent holes in their walls. Plus, they come in various sizes and strengths, so you can find the perfect match for the weight and length of your garland.
When hanging your garland, think beyond the usual mantel display. Get creative! Drape it around your stair railing for an enchanting entrance, across a large window frame to bring some autumnal vibes inside, or even weave it through an empty picture frame as an unexpected focal point on the wall. The possibilities are endless!
By following these tips and thinking outside the box (or should I say frame), you’ll not only ensure your DIY dried orange garland stays intact but also transform any space into a cozy haven that gives off all those fall feels. So go ahead and get crafty with those oranges – happy hanging!
Final Thoughts on DIY Dried Orange Garland for Fall Decor
So there you have it – my DIY dried orange garland for fall decor is finally complete! As I sit here admiring my handiwork, I can’t help but reflect on the whole process. First off, I never thought that I would spend an entire afternoon slicing oranges and waiting impatiently for them to dry. But let me tell you, the end result is totally worth it.
Not only does this garland add a warm and rustic touch to my home, but it also brings a subtle yet delightful citrus scent that fills the air. Every time I walk into the room, I’m greeted by the fragrant aroma of fall combined with a hint of freshness. It’s like having a mini orchard right in your living room!
But aside from its visual and olfactory appeal, this garland has another unexpected benefit – it actually makes me feel crafty! As someone who lacks any artistic skills whatsoever, completing this project has given me a much-needed confidence boost. Now whenever guests come over and compliment my fall decorations, instead of modestly saying Oh, thanks, I can proudly respond with Thank you! Made it myself! It’s almost as if this garland is not just a piece of decor but also an emblem of personal growth.
In conclusion, while making this DIY dried orange garland may require some patience and effort (and maybe even a few sliced finger casualties), the end result will truly elevate your fall decor game.


One Comment
Andi Lamb
This garland would easily transfer to Christmas decor as well. Would be gorgeous on a mantle or as tree Garland! Love this idea!