Ideas for Carving a Pumpkin Face
Carving a pumpkin is a fun activity that can be enjoyed by the whole family. It’s also a great way to get into the Halloween spirit. Carving pumpkins for fall has a long and storied history. the practice is thought to have originated with the Irish, would hollow out turnips and carve them into faces to ward off evil spirits. When Irish immigrants came to north America, they brought their tradition with them, and began carving pumpkins instead. Over time, the custom has evolved, and today carving pumpkins is a popular way to celebrate Halloween.
Choosing a Pumpkin
When carving a pumpkin, it’s important to choose the right one. You want a pumpkin that is big enough to carve into, but not too big that it will be difficult to carry. The skin should be firm and free of blemishes. You also want to make sure the stem is intact so the pumpkin can be properly displayed. The pumpkin should also be flat on the bottom so it can stand up on its own.
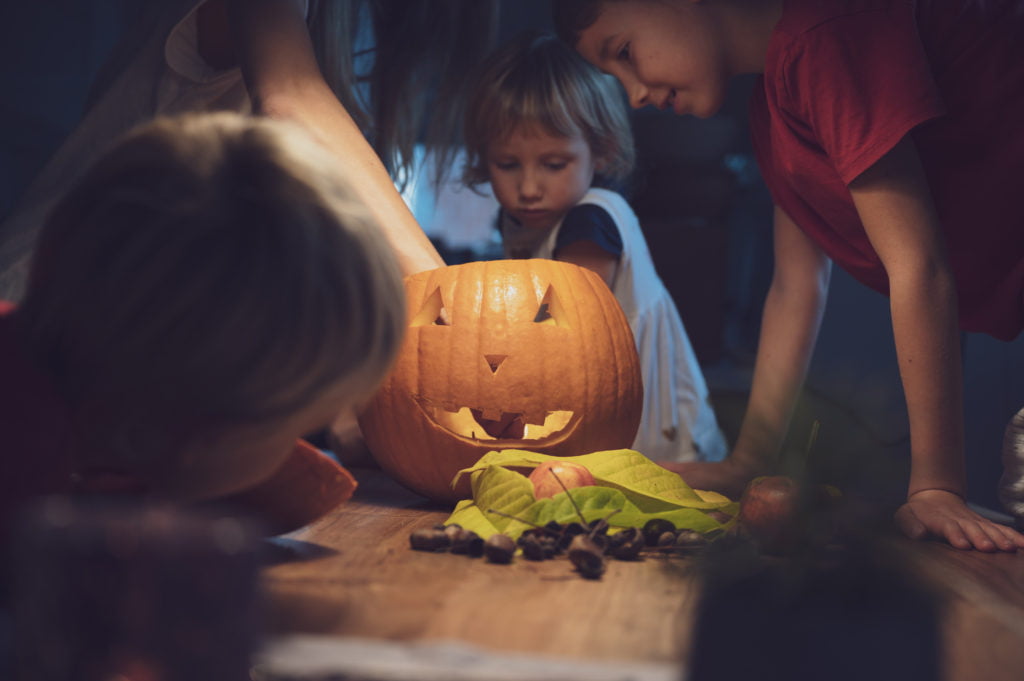
Creative Family Game for Carving
One way to make carving a pumpkin more fun is to make a game out of it. Have each family member take turns carving a section of the pumpkin, and then see who can come up with the scariest face. You can also get creative with the designs and carve different shapes into the pumpkin.
Carving tools
To carve a pumpkin, you will need a few carving tools. A sharp carving knife is the most important tool you will need. You will also need a spoon or scoop to remove the pulp and seeds from the inside of the pumpkin. Finally, you will need a small saw to cut through the stem.
When carving your pumpkin, be sure to place it on a stable surface. A cutting board or piece of cardboard will work well. Also, be sure to wear gloves to protect your hands from the sharp carving knife.
Instructions:
1. Cut off the top of the pumpkin with a carving knife. This will create an opening for you to remove the pulp and seeds from inside the pumpkin.
2. Use a spoon or scoop to remove the pulp and seeds from inside the pumpkin.
3. Once the inside of the pumpkin is clean, you can start carving your design into the pumpkin skin.
4. To make carving easier, you can sketch your design onto the pumpkin with a pencil before carving.
5. When you’re finished carving, put a candle inside the pumpkin and display it in a safe place.
Carving tips
Here are a few carving tips to help you create the perfect pumpkin carving:
- Use a sharp carving knife to make clean, precise cuts.
- If you’re having trouble carving certain areas of the pumpkin, try using a small saw to cut through the tougher sections.
- Be creative with your designs! You can carve anything from simple faces to complex patterns.
- When carving faces, remember that less is more. Too many features will make the face look crowded and messy.
- To keep your carving tools from getting dull, sharpen them after each use.
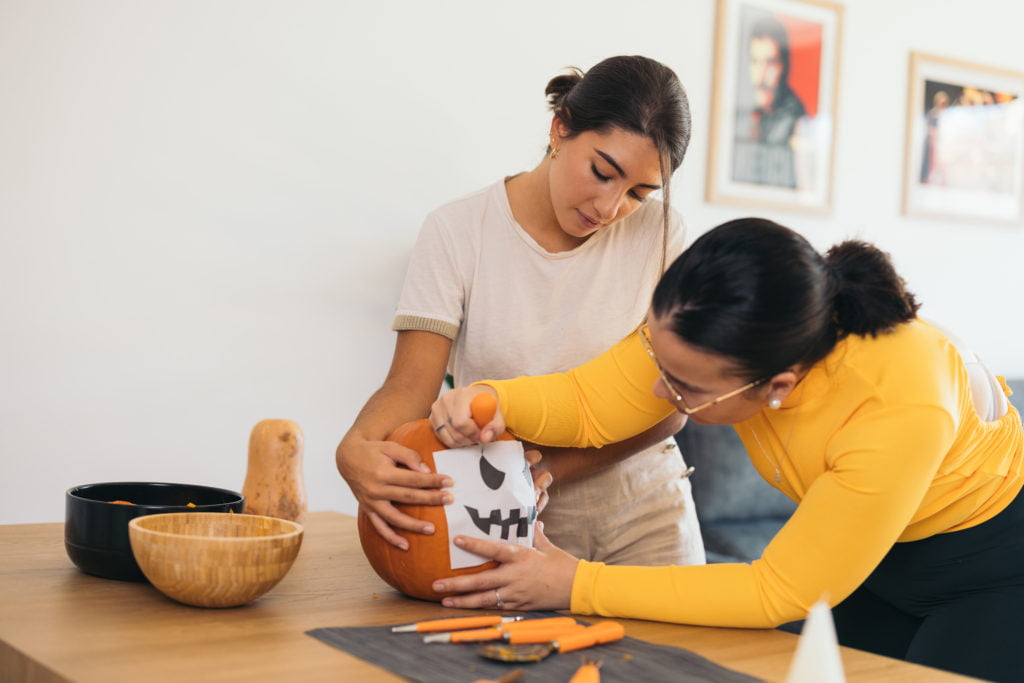
Choosing the Face of the Pumpkin
When choosing a face to carve into your pumpkin, it’s important to pick one that is easy to recreate. You want to avoid carving intricate details into the pumpkin skin, as it can be difficult to make precise cuts. Simple designs, such as a smiley face or a jack-o-lantern, are the best choices for beginners. You can also use a template to help you create the perfect carving.
Finding the Best Templates for Carving a Pumpkin
There are many different carving templates available online and in stores. You can also find carving stencils at most craft stores. When choosing a carving template, be sure to find one that is the right size for your pumpkin. You don’t want a template that is too big or too small. Also, be sure to choose a design that is easy to carve.
Top 7 Pumpkin Faces to Carve
1. Smiley face
A smiley face pumpkin is a great choice for beginners. The design is simple and easy to carve, and it always looks cheerful. To create a smiley face pumpkin, start by carving a large circle for the head, and then carve a smaller circle inside for the face. Next, carve two small circles for the eyes and a smiling mouth. Finally, add some details to the face with a carving knife.
2. Jack-o-lantern
The jack-o-lantern is a traditional Halloween decoration that originated in Ireland.
The name “jack-o-lantern” is derived from the phrase “Jack of the Lantern”, which refers to a Will-o’-the-wisp, a ghostly light that often appears in swamps and marshes. The first jack-o-lanterns were made from carved turnips, but pumpkins are now commonly used.
To create a jack-o-lantern, start by carving a face into the pumpkin. You can use any design you like, but simple designs are best for beginners. Next, cut out the top of the pumpkin so you can place a candle inside. Be sure to put the candle in a safe place so it doesn’t fall out of the pumpkin. Finally, display your jack-o-lantern in a window or on your porch for all to see!
3. Witch
Carving a witch in a pumpkin is a perfect way to celebrate Halloween. the best way to start is by drawing the outline of the witch’s hat and head on the pumpkin with a pencil. Then, use a carving knife to cut out the shapes. Next, carve out the eyes, nose, and mouth of the witch. finally, add some details to the hat and dress with a carving knife.
4. Ghost
The ghost is one of the most popular designs to carve into a pumpkin. It’s simple to recreate, and it always looks spooky and festive. To carve a ghost, start by carving a large, round shape for the body. Next, carve out two small circles for the eyes and a simple mouth. Finally, add some details to the ghost with a carving knife. You can make your ghost look more realistic by carving a triangle-shaped hole in the top of the pumpkin for the head.
5. Frankenstein
If you’re looking for a more challenging carving project, try creating a Frankenstein pumpkin. This design is a bit more complicated, but it’s still a great choice for beginners. To create a Frankenstein pumpkin, start by drawing the outline of the head and body on the pumpkin with a pencil. Next, use a carving knife to cut out the shapes. Next, carve out the eyes, nose, and mouth of the Frankenstein. Finally, add some details to the head and body with a carving knife. You can make your Frankenstein look more realistic by carving bolts into the side of the head.
6. Favorite Disney Character
When choosing a Disney character to carve on your pumpkin, be sure to choose one that is easy to recreate. Some of the more popular Disney characters to carve include Mickey Mouse, Minnie Mouse, Donald Duck, and Daisy Duck. If you’re feeling more adventurous, you can also try carving a character from a newer Disney movie, such as Frozen or Moana. Be sure to add some festive Halloween decorations, such as pumpkins or spider webs, to complete the look.
7. Cat
Carving a cat on a pumpkin is a fun and easy project that can be completed in just a few steps. First, draw the outline of the cat’s body and head on the pumpkin with a pencil. Next, use a carving knife to cut out the shapes. Next, carve out the eyes, nose, and mouth of the cat. Finally, add some details to the cat’s body and fur with a carving knife. You can make your cat look more realistic by carving stripes into the body and fur.
The jack-o-lantern, witch, ghost, Frankenstein, Disney character and cat are all popular designs to carve into a pumpkin. If you’re looking for a carving project to do with your kids this Halloween, be sure to try one of these designs. They’re all simple enough that they can be completed in just a few steps, and they always look festive and spooky. Happy Halloween & Happy carving!